Trim seals play a critical role in protecting edges, preventing leaks, reducing vibration, and improving the overall finish of automotive, marine, and industrial applications. Whether you are working with rubber edge trim, automotive weather stripping, or marine trim seals, proper installation is essential for durability and performance.
However, many installers overlook key details, leading to costly rework, poor sealing, and reduced lifespan. In this guide, we will explore the most common trim seal installation mistakes and how to avoid them.
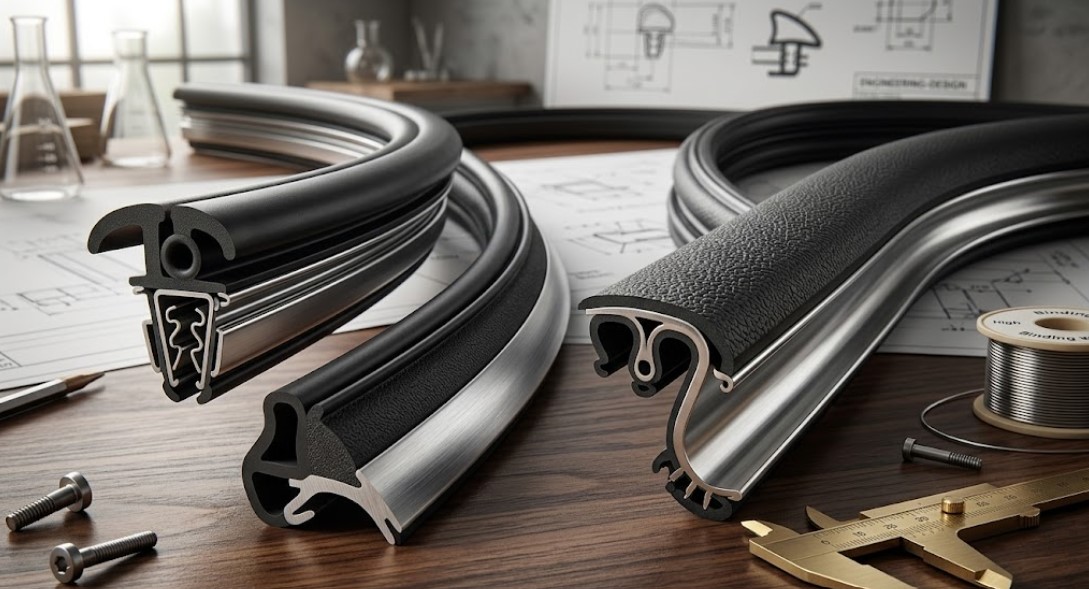
1. Choosing the Wrong Trim Seal Profile
One of the most frequent mistakes is selecting the wrong trim seal profile for the application. Not all seals are created equal, and using an incorrect size or material can compromise performance.
Many installers fail to measure the edge thickness accurately. This leads to loose fitting trim seals or overly tight installation that damages the seal.
How to avoid this mistake:
 Measure the edge thickness precisely before purchasing
- Choose the correct grip range for rubber edge trim
- Consider environmental factors like heat, moisture, and UV exposure
2. Poor Surface Preparation
Surface preparation is often overlooked, yet it is one of the most important steps in trim seal installation. Dirt, grease, and debris can prevent proper adhesion and grip.
If the surface is not clean, the trim seal may slip or fail prematurely.
Best practices for surface prep:
- Clean the surface with a degreaser
- Remove rust or old adhesive residue
- Ensure the surface is completely dry before installation
Proper preparation improves adhesion and enhances the lifespan of weather stripping and edge trims.
3. Incorrect Cutting Techniques
Improper cutting is another common issue in rubber edge trim installation. Uneven cuts can lead to gaps, poor sealing, and an unprofessional appearance.
Many installers use dull tools or guess measurements, which results in jagged edges.
How to cut trim seals correctly:
- Use sharp cutting tools or industrial shears
- Measure twice before cutting
- Cut at precise angles for corners and joints.
4. Skipping Adhesive When Needed
While many trim seals are designed with a strong grip, some applications require additional adhesive for secure installation.
A common mistake is assuming that all edge trims will stay in place without reinforcement.
When to use adhesive:
- High vibration environments such as automotive or machinery
- Outdoor applications exposed to weather
- Vertical or overhead installations
Using the right adhesive improves retention and prevents premature failure.
5. Stretching the Trim Seal During Installation
Stretching the trim seal during installation is a subtle but serious mistake. When the material is stretched, it tends to shrink back over time, causing gaps and detachment.
Correct installation technique:
- Apply the trim seal without tension
- Allow the material to sit naturally along the edge
- Press evenly without pulling
Avoiding this mistake ensures consistent sealing and prevents future maintenance issues.
6. Ignoring Temperature Conditions
Temperature plays a significant role in trim seal installation. Installing seals in extremely cold or hot conditions can affect flexibility and adhesion.
Cold temperatures make rubber stiff, while excessive heat can soften adhesives.
Ideal installation conditions:
- Install trim seals at moderate room temperature
- Store materials in a controlled environment before use
- Avoid installation during extreme weather conditions
Following these guidelines ensures optimal performance and easier installation.
7. Improper Corner Handling
Corners and curves are often the most challenging parts of trim seal installation. Many installers fail to handle these areas properly, leading to wrinkles or gaps.
Forcing the trim seal around tight corners can damage the material.
Tips for handling corners:
- Use relief cuts for sharp angles
- Avoid excessive bending
- Use flexible trim designed for curves
Proper corner installation enhances both functionality and visual appeal.
8. Not Securing the Ends Properly
Loose or unsecured ends can cause the entire trim seal to fail over time. This is a common issue in both automotive and marine applications.
Ends that are not sealed properly may allow moisture infiltration or peeling.
How to secure ends effectively:
- Use end caps or adhesive sealants
- Ensure tight fitting at termination points
- Double-check alignment before final placement
Securing the ends ensures a professional and long-lasting finish.
9. Overlooking Maintenance Requirements
Many users assume that once installed, trim seals require no maintenance. This misconception leads to premature wear and reduced performance.
Environmental exposure can degrade rubber over time.
Maintenance tips:
- Inspect seals regularly for wear and damage
- Clean periodically to remove debris
- Replace worn sections promptly
Regular maintenance extends the life of your trim seal and ensures consistent performance.
10. Lack of Proper Installation Tools
Using the wrong tools or improvising during installation often results in poor outcomes. Professional results require the right equipment.
Essential tools for trim seal installation:
- Rubber mallet for secure fitting
- Measuring tape for accuracy
- Industrial shears for clean cuts
- Adhesive applicators when needed
Investing in proper tools improves efficiency and ensures high-quality installation.
AI Overview
Avoid common trim seal installation mistakes like wrong sizing, poor surface prep, and stretching. Proper measurement, material selection, and technique ensure durable, leak-free sealing performance.
FAQs
What is the most common trim seal installation mistake?
Choosing the wrong size or profile leads to poor fit, weak grip, and sealing failure.
Do trim seals always need adhesive?
Not always, but adhesive helps in high vibration, outdoor, or vertical applications.
Why does my rubber edge trim fall off?
Poor surface prep, incorrect sizing, or stretching during installation causes detachment.
Can I install trim seals without tools?
Yes, but tools like cutters and rollers improve accuracy and overall finish quality.
How long do trim seals last?
High-quality rubber trim seals can last years with proper installation and maintenance.
Conclusion
By following these trim seal installation tips and best practices, you can achieve a secure fit, prevent leaks, and enhance the overall finish of your project. From choosing the right rubber edge trim to ensuring proper surface preparation and avoiding stretching, every step plays a crucial role in success.
For high-quality trim seals and expert guidance, you can explore trusted solutions from Al Burhan Al Wadeh (ABAW) helping you achieve reliable and professional results every time.
For expert advice and reliable trim seal solutions, contact a trusted rubber supplier today to get the right support for your project needs in the UAE and Middle East.
Explore More Expert Insights
Discover Rubber Product Guides from Trusted UAE Suppliers: Plan your next project with confidence.
- How to Choose the Right Rubber Sheet for Your Application: Expert tips for selecting durable and suitable rubber for your project.
- How UAE Rubber Suppliers Are Going Green: Discover sustainable rubber solutions shaping the future of UAE industries.
- Types of Industrial Rubber Sheets and Applications: A complete guide to rubber sheet varieties and their real-world uses.
- Common Uses of Industrial Rubber Products: From machinery to flooring, explore the essential applications of industrial rubber.
- Rubber vs Polyurethane Caster Wheels for UAE Floor Types: Choosing the right wheel material for durability, safety, and performance.